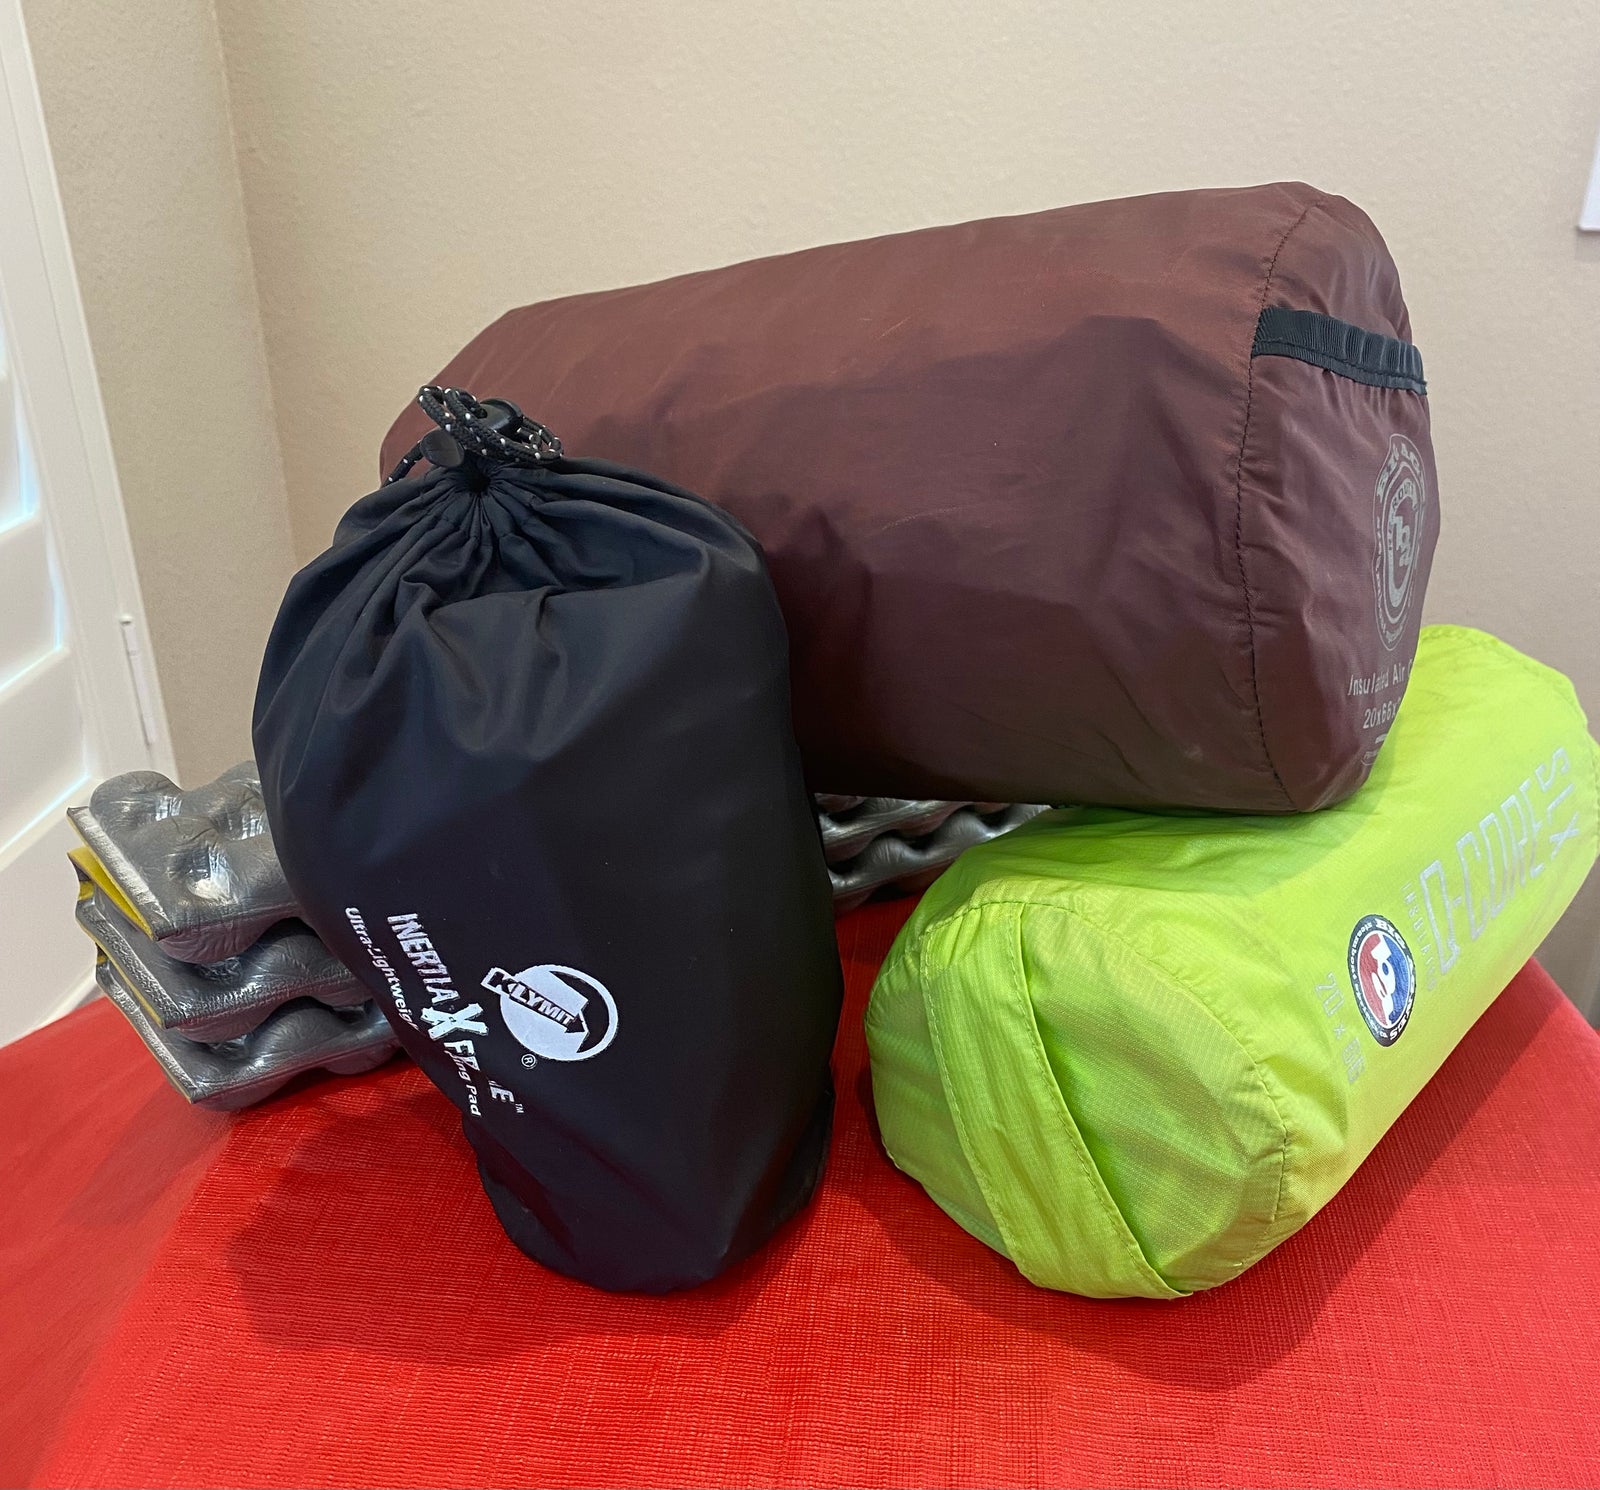
Sleeping Mats for Plus Size Backpackers

Finding a comfortable sleeping system is the Holy Grail of backpacking, if you ask me.
This is part 2 in a 5 series on how to build out the perfect sleep system for you.
But first... what is a sleep system.
A backpacking sleep system consists of the same backpacking gear layers you're already familiar with:
- base layer (clothing to sleep in)
- mid layer (sleeping bag liner)
- insulation (bag and mat)
- outer layer (shelter)
- foot protection (socks)
- head protection (pillow/cushion and a hat)
We covered item half of the insulation layer over here, let's take on the other half:
Finding the Perfect Insulation
When I was young and carefree I thought sleeping mats were for old people. Now (that I'm old people), I understand they're a necessity. Not only do sleeping mats add a little cushion for comfort--they also add insulation against the cold ground. Different mats have different r-values (energy efficiency ratings), so pay attention when shopping!
Finding a sleeping mat starts the same way as finding a sleeping bag: an honest evaluation of how you sleep at home and on the trail, and the pros and cons of your current set up.
We're going to keep referring to this list, so here it is again:
- Take an honest assessment of how you sleep at home--side, back, stomach, like a starfish, curled up in a ball, feet hanging over the edge, head pressed against the headboard, all of the above, etc
- Take a realistic assessment of how you tend to sleep in the woods--do you wear a beanie? Do you roll off your pad? Are you too hot? Too cold? Do you wake up with a dead arm? Terrible morning back pain?
- Pros and cons of your current sleep system--weight, shape, warmth rating, length of insulating layer, how the baffling system works, how much compression you get in a single area
For me, this looks like this:
- home: I sleep in every orientation with one foot hanging off the bed
- backpacking: I scrunch all the way down so my head is covered, which means I'm kind of in a ball. I frequently have trouble staying on my mat.
- starting system: I went with a short pad because I'm short and when it's warm I like a separate space for my head from my pad. It also allows for a bit more flexibility in how I lay out my sleeping space at night. I slid off my pad constantly. And I always woke up with a dead arm from side sleeping.
Armed with this list, I, once again, hit up my local outfitters and laid on every pad, mat, insulating system they had. I also took to the internet and ordered some extreme options with good return policies. I even tried the Klymit Inertia X Frame. Pro tip: This pad is built for the average western male. If you're not in that range, you'll likely find the mid-points with extra insulation are simply not in the right spot for your body.
Ultimately, I have opted for the Big Agnus Insulated Q-Core Deluxe. I went with the standard width, which is ok, but not great, and typing up this blog post has made me realize I should probably try out the wider pad. The downside of the standard width is that I still roll off the thing. The thickness of the pad has alleviated the dead arm problem (which made it a clear winner)!
That said, one of the problems I've had long term with air mattresses is they really aren't made with heavier bodies in mind so, overtime, the valves can fail. I've had a good experience with BA replacing my air mattress under warrantee, which is fantastic.
Is this the golden sleep pad? Not for me. But it's good enough, and with the price point of high quality sleeping pads, I'll probably hang on to it until it's time to replace it. I'll let you know if I upgrade!
Final Thoughts
Trial and error is the best way to find your perfect system. Test out, borrow, and rent what you can. At the end of the day, get out and have fun! You can upgrade as your budget allows.
Happy hiking!


